Home » Blog » Configuring DHCP on Windows Server: A Step‑by‑Step Guide

Configuring DHCP on Windows Server: A Step‑by‑Step Guide

Dynamic Host Configuration Protocol (DHCP) is a core networking service that automatically assigns IP addresses to devices on a network. Without DHCP, administrators would need to manually configure IP addresses for every device — a time‑consuming and error‑prone process, especially in large organizations.

DHCP simplifies configuration management, improves scalability, streamlines IP address allocation, and makes network troubleshooting easier.

This guide walks you through:

  • Installing the DHCP Server role
  • Understanding the IP addressing used in the example
  • Preparing for DHCP scope creation


Understanding the IP Addressing Used

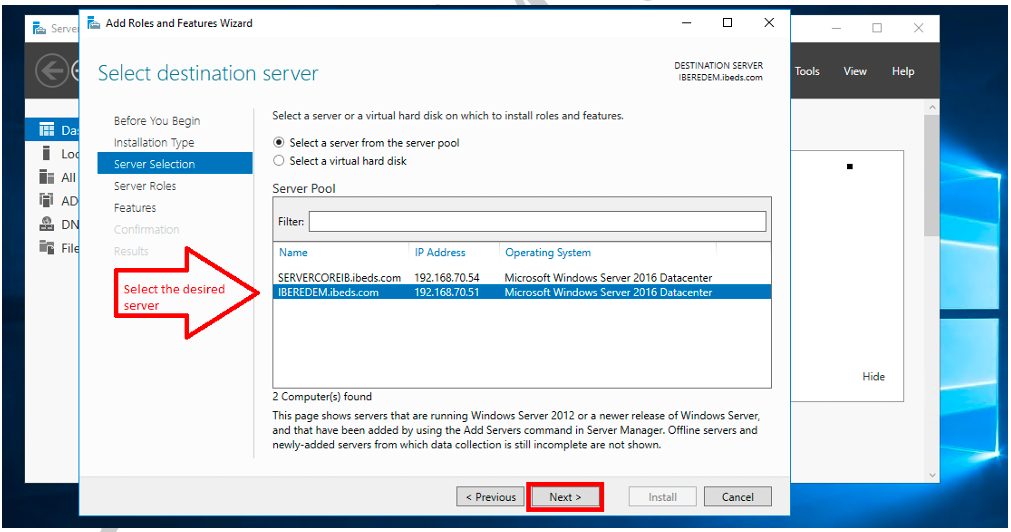
For this demonstration, the following Class C network was used:

  • Network: 192.168.70.0 /29
  • Subnet Mask: 255.255.255.248
  • Subnet Range Used: 7th subnet
  • Usable IP Range: 192.168.70.49 – 192.168.70.54
  • Network Address: 192.168.70.48
  • Broadcast Address: 192.168.70.55

A basic understanding of subnetting is recommended before configuring DHCP scopes.

Step 1–10

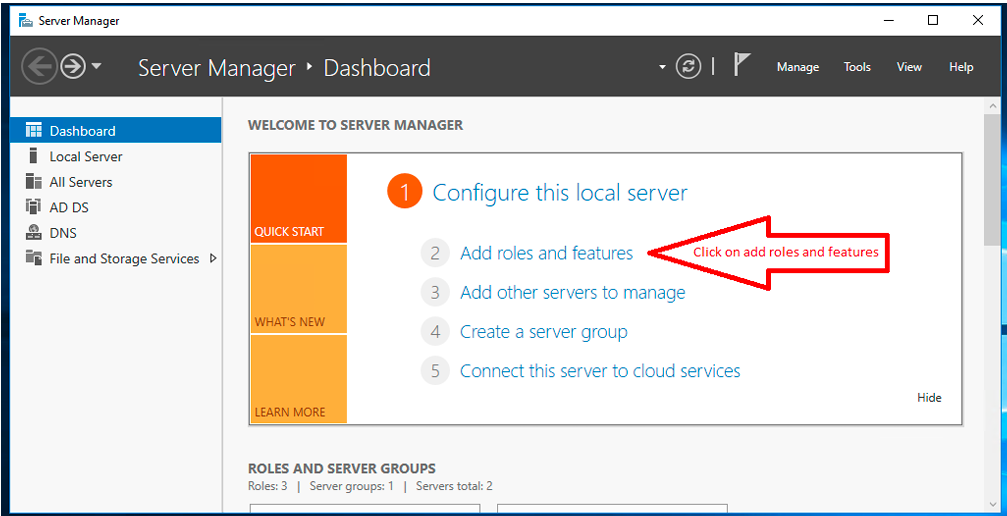
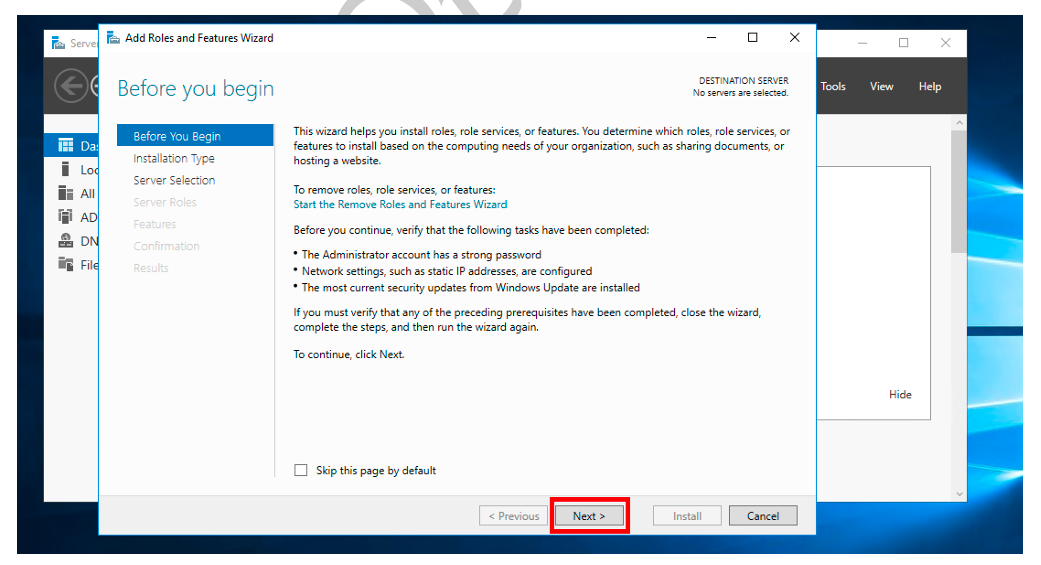
Use Server Manager → Add Roles and Features to install the DHCP Server role. Proceed through the wizard, confirming selections until installation begins

1: Click on Add roles and Features to begin the installation process. Next, proceed to the following screen


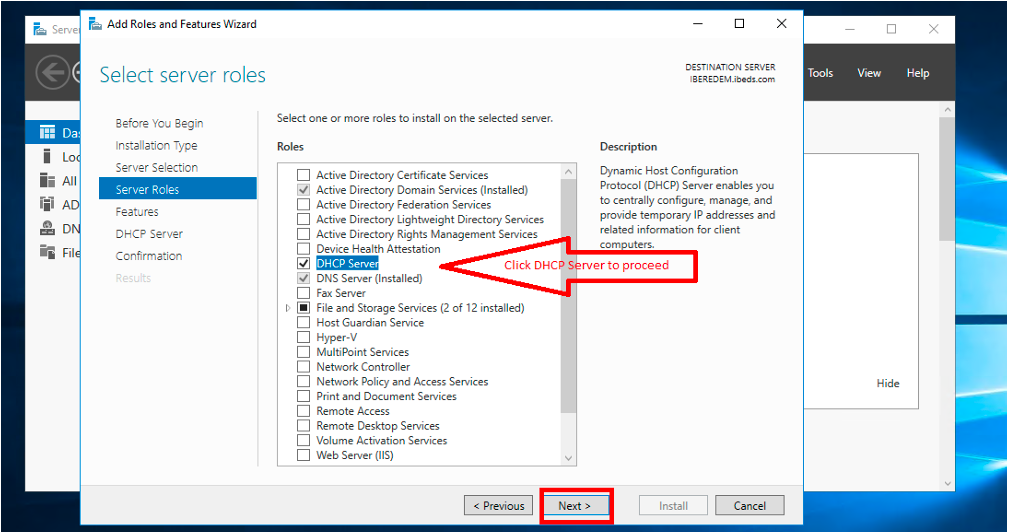
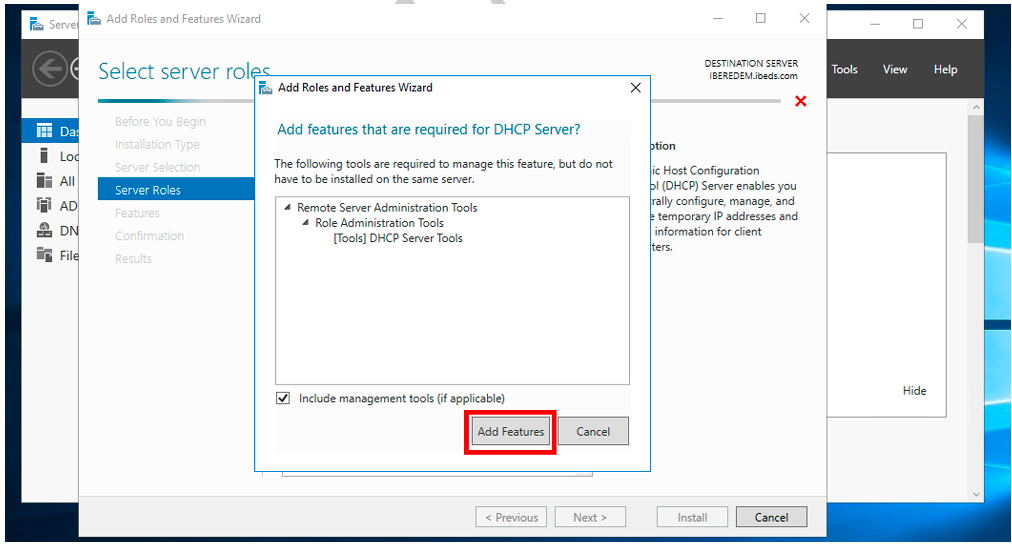
2: Select DHCP Server from the list of roles. After that, click Next to continue.


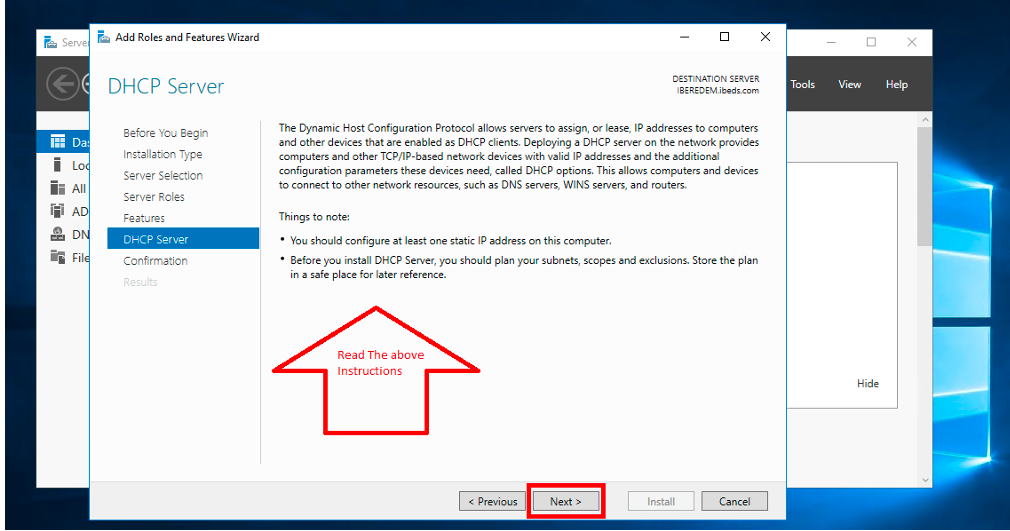
3: Review the installation details. Then, confirm your selections to move forward


4: Wait for the installation to complete. Once done, click Close to exit the wizard


5: Open Server Manager to verify the DHCP role. From here, navigate to the Tools menu.


6: Click DHCP under Tools. At this point, the DHCP console should open.
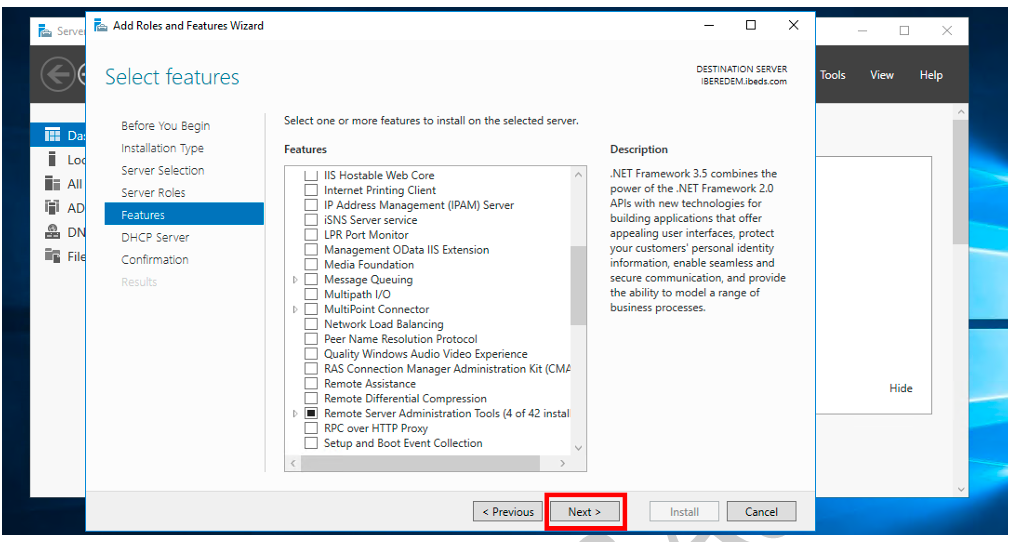
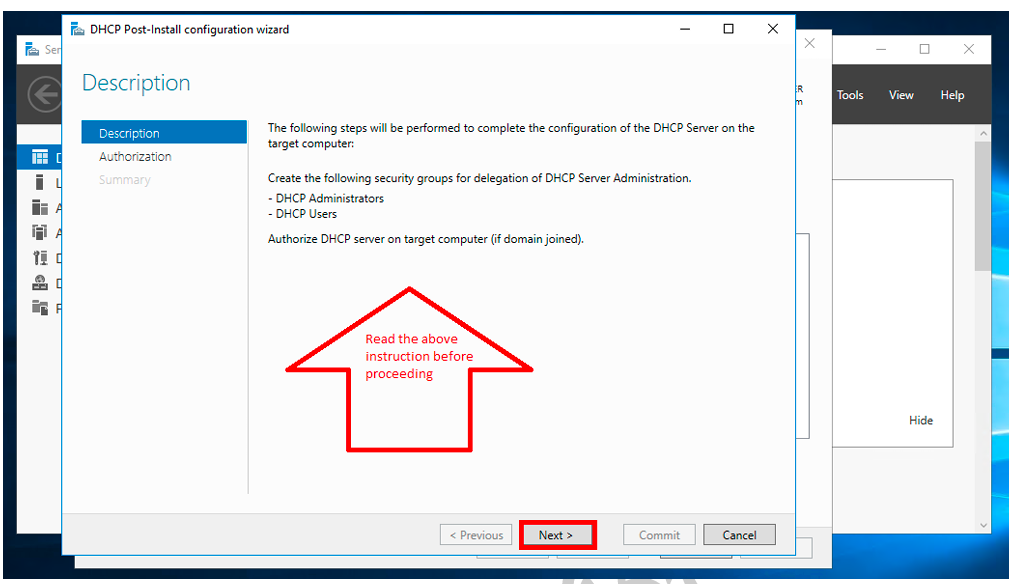


7:  Click Next


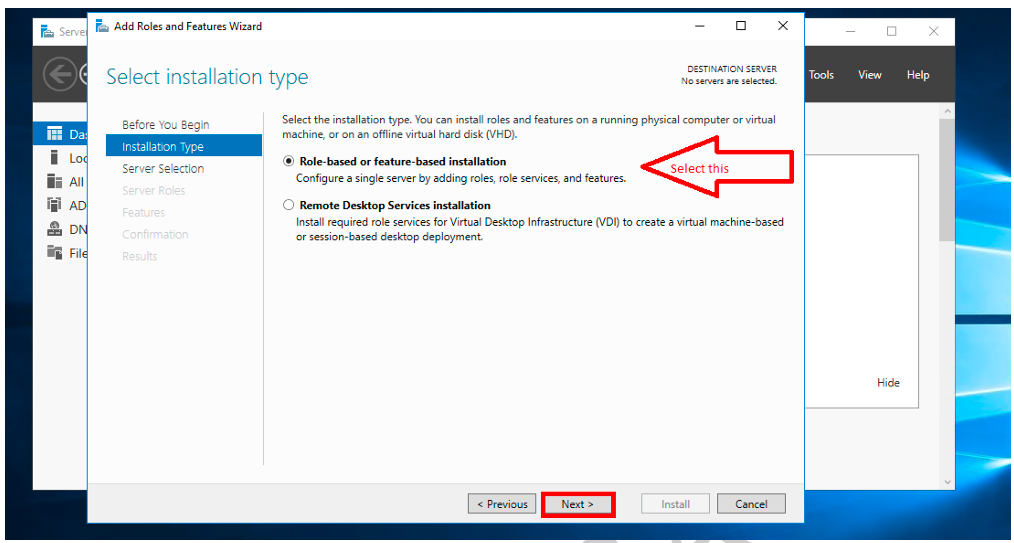
8: Proceed to the next stage


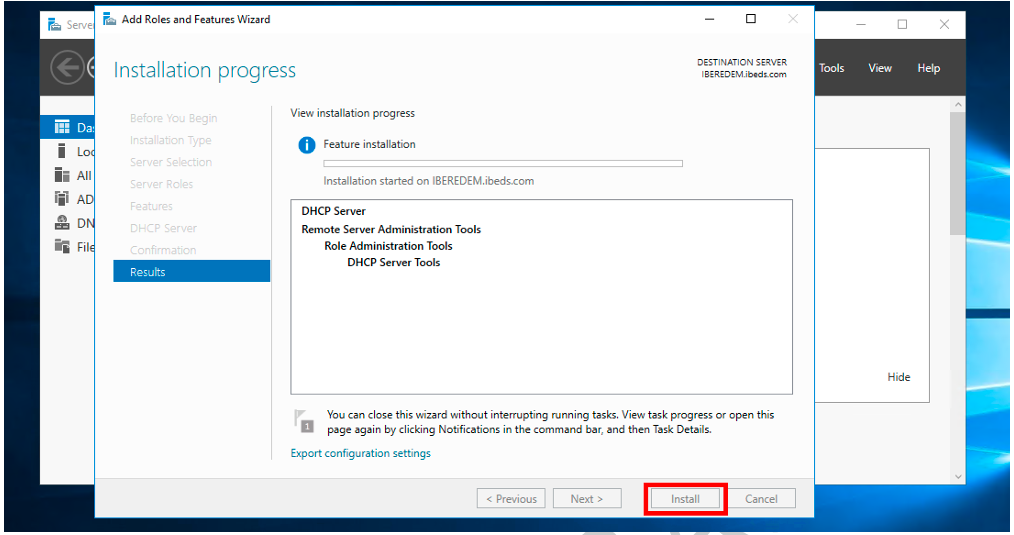
9:  Click install and let it install


10 Then, you need to complete the DHCP configuration
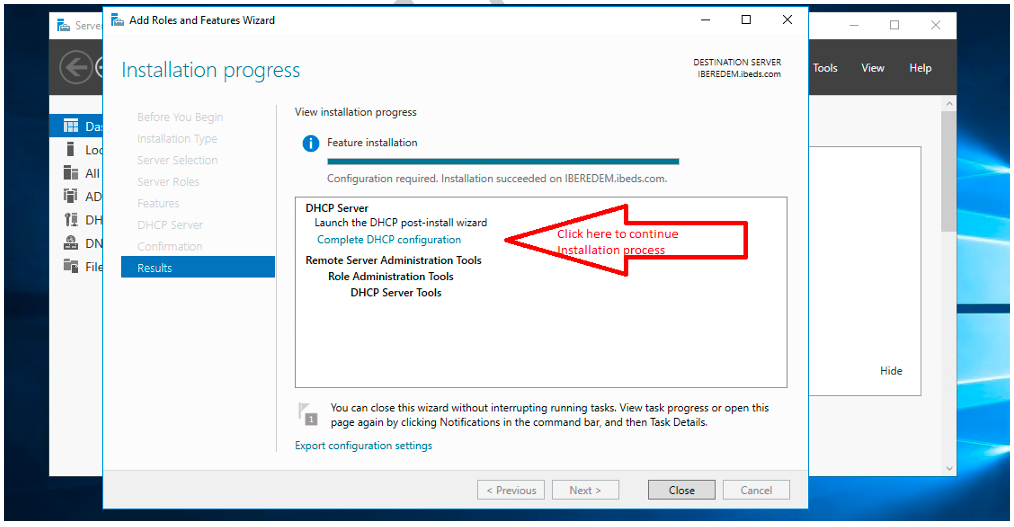
 

11


Step 12–15

Additionally, Once authorization is complete, DHCP will appear on the Server Manager dashboard, confirming successful installation.

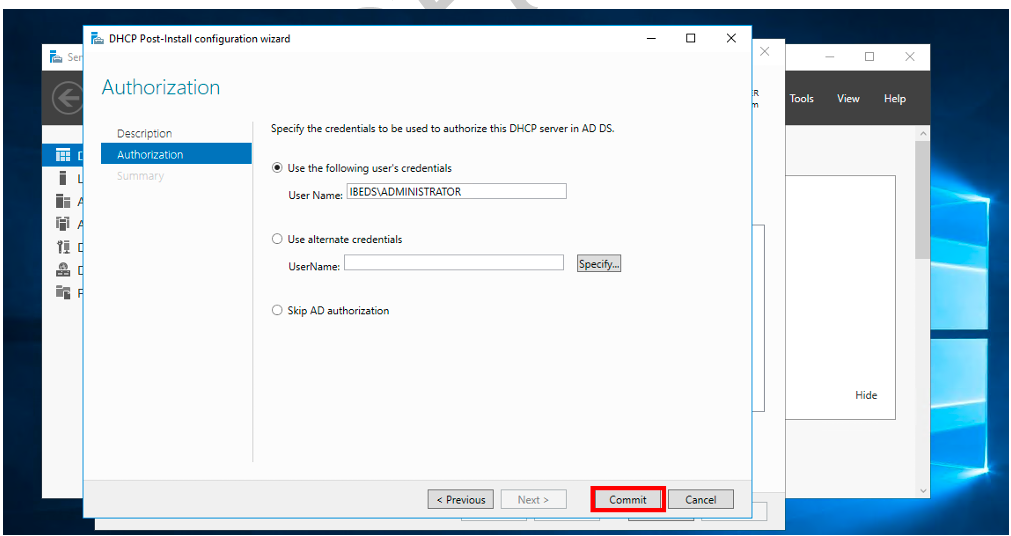
12. Hence, you need to provide user’s credential to be used


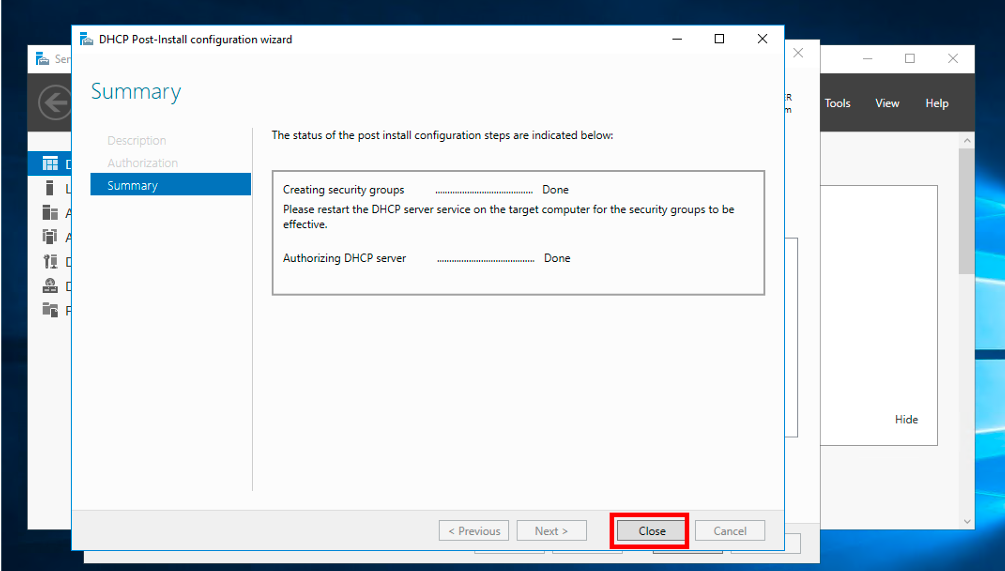
13:  following the provision of user credential, the installation wizard shows you a summary of what you have done.


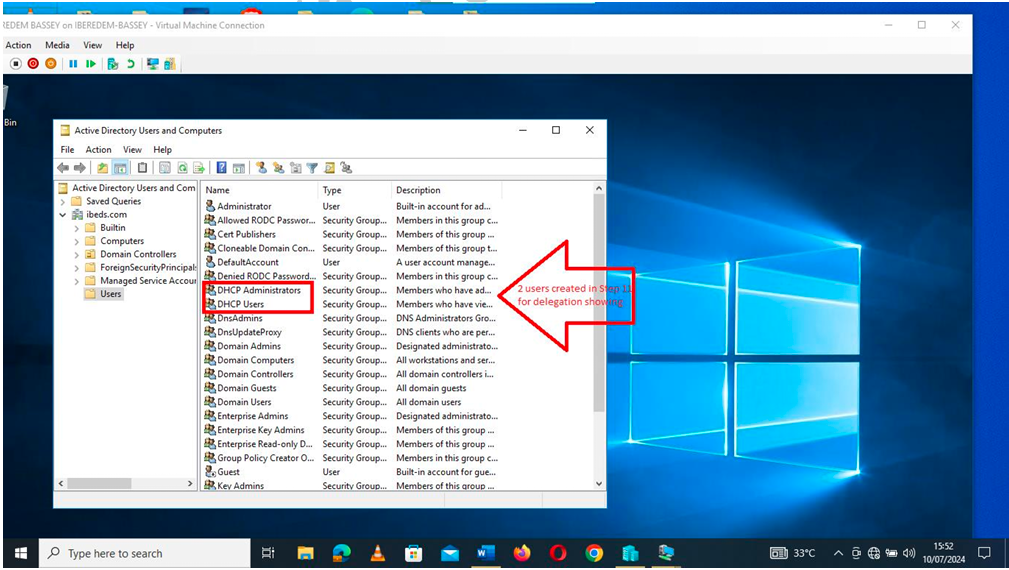
14: As mentioned in Step 11, two user accounts were created earlier in Active Directory Users and Computers; these accounts will subsequently be used for DHCP delegation.


15 Subsequently, DHCP is showing on dashboard


click on this to see the part 2 on linkedIn 

Home

Leave a Comment

Your email address will not be published. Required fields are marked *

We use cookies to personalise content and ads, to provide social media features and to analyse our traffic. We also share information about your use of our site with our social media, advertising and analytics partners. View more
Cookies settings
Accept
Decline
Privacy & Cookie policy
Privacy & Cookies policy
Cookie name Active

Who we are

Suggested text: Our website address is: https://basyltech.com.

Comments

Suggested text: When visitors leave comments on the site we collect the data shown in the comments form, and also the visitor’s IP address and browser user agent string to help spam detection. An anonymised string created from your email address (also called a hash) may be provided to the Gravatar service to see if you are using it. The Gravatar service Privacy Policy is available here: https://automattic.com/privacy/. After approval of your comment, your profile picture is visible to the public in the context of your comment.

Media

Suggested text: If you upload images to the website, you should avoid uploading images with embedded location data (EXIF GPS) included. Visitors to the website can download and extract any location data from images on the website.

Cookies

Suggested text: If you leave a comment on our site you may opt in to saving your name, email address and website in cookies. These are for your convenience so that you do not have to fill in your details again when you leave another comment. These cookies will last for one year. If you visit our login page, we will set a temporary cookie to determine if your browser accepts cookies. This cookie contains no personal data and is discarded when you close your browser. When you log in, we will also set up several cookies to save your login information and your screen display choices. Login cookies last for two days, and screen options cookies last for a year. If you select "Remember Me", your login will persist for two weeks. If you log out of your account, the login cookies will be removed. If you edit or publish an article, an additional cookie will be saved in your browser. This cookie includes no personal data and simply indicates the post ID of the article you just edited. It expires after 1 day.

Embedded content from other websites

Suggested text: Articles on this site may include embedded content (e.g. videos, images, articles, etc.). Embedded content from other websites behaves in the exact same way as if the visitor has visited the other website. These websites may collect data about you, use cookies, embed additional third-party tracking, and monitor your interaction with that embedded content, including tracking your interaction with the embedded content if you have an account and are logged in to that website.

Who we share your data with

Suggested text: If you request a password reset, your IP address will be included in the reset email.

How long we retain your data

Suggested text: If you leave a comment, the comment and its metadata are retained indefinitely. This is so we can recognise and approve any follow-up comments automatically instead of holding them in a moderation queue. For users that register on our website (if any), we also store the personal information they provide in their user profile. All users can see, edit, or delete their personal information at any time (except they cannot change their username). Website administrators can also see and edit that information.

What rights you have over your data

Suggested text: If you have an account on this site, or have left comments, you can request to receive an exported file of the personal data we hold about you, including any data you have provided to us. You can also request that we erase any personal data we hold about you. This does not include any data we are obliged to keep for administrative, legal, or security purposes.

Where your data is sent

Suggested text: Visitor comments may be checked through an automated spam detection service.
Save settings
Scroll to Top
Verified by MonsterInsights