
How to Create Resource Groups & Virtual Networks in Azure
Are you diving into Azure and wondering how to keep your cloud resources organized and
connected? I recently explored how to create Resource Groups and Virtual Networks
(VNets) in Azure two foundational steps for any cloud solution. Here’s a quick breakdown:
Resource Group: Think of it as a folder to keep your related Azure resources together,
simplifying management, access, and billing.
Virtual Network: This defines your private IP space in Azure and acts as a backbone for
secure communication between services.
Steps to Create Them:
How to Create a Resource Group:
• Go to the Azure Portal
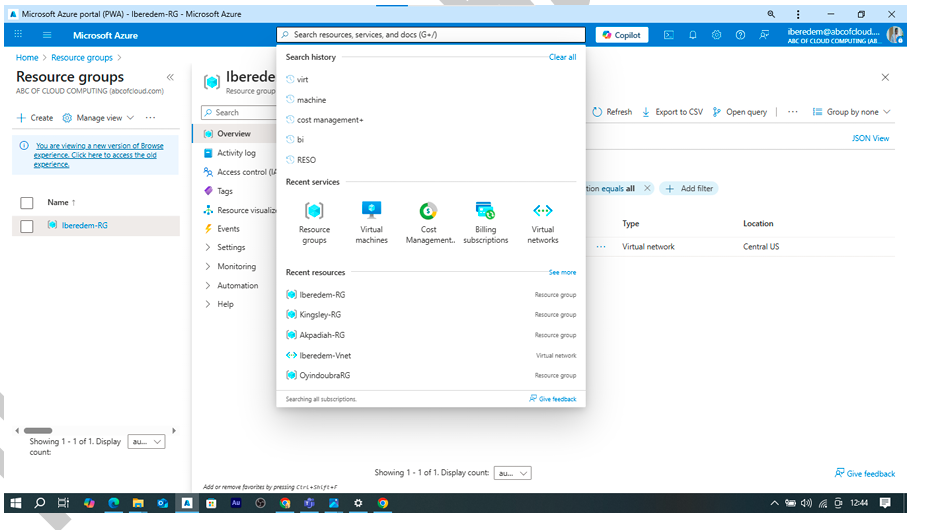
Navigate to Resource groups
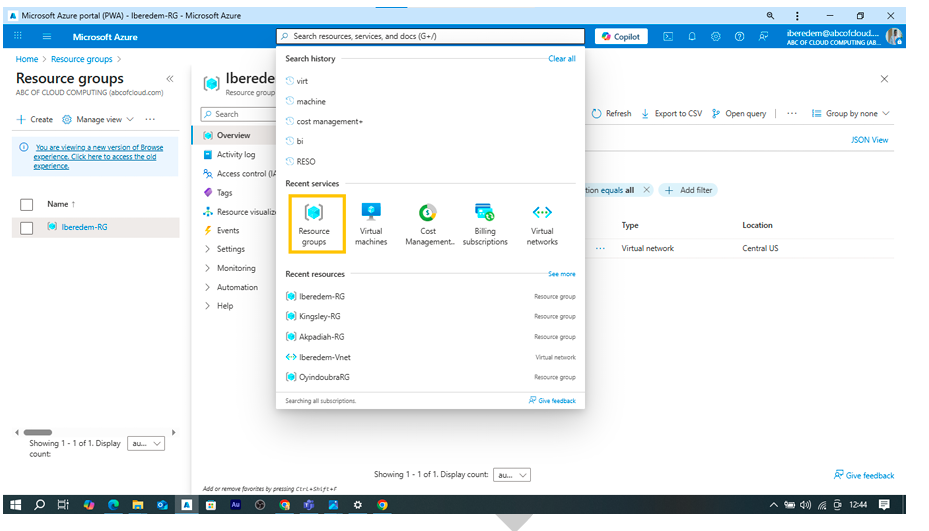
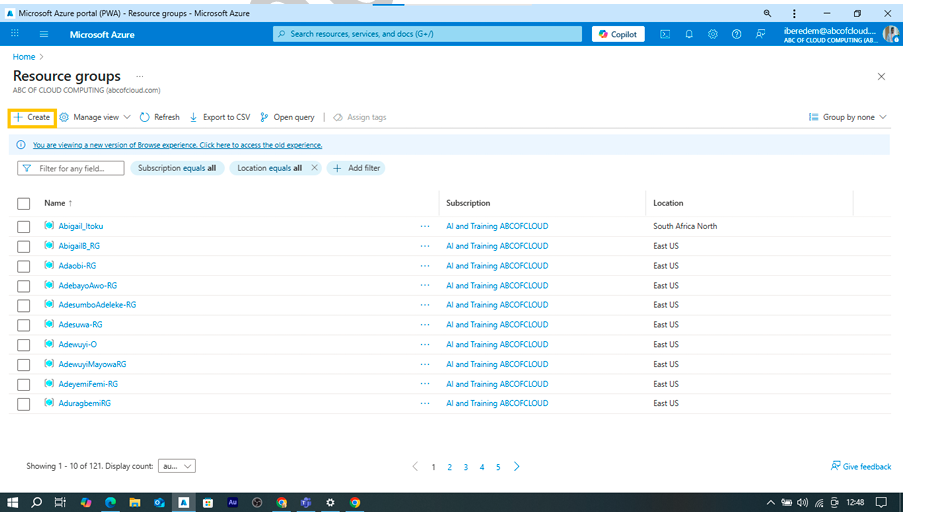
Click “+ Create”
Next, Fill in your subscription, name, and region
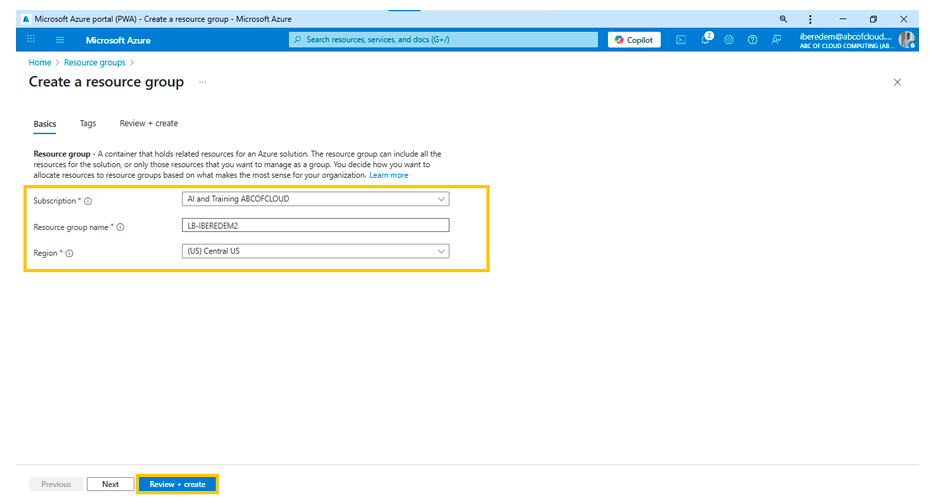
Next, Click “Review + Create” → “Create”
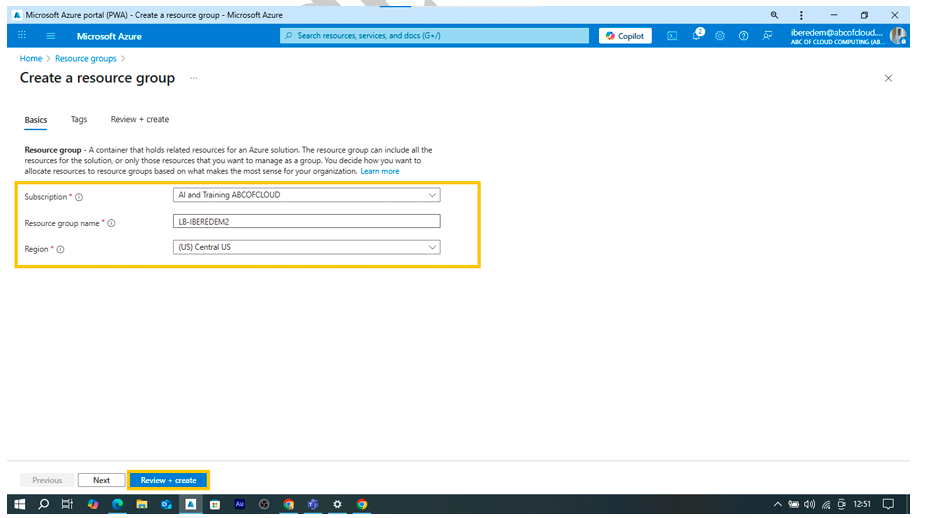
Finally, Resource group created.
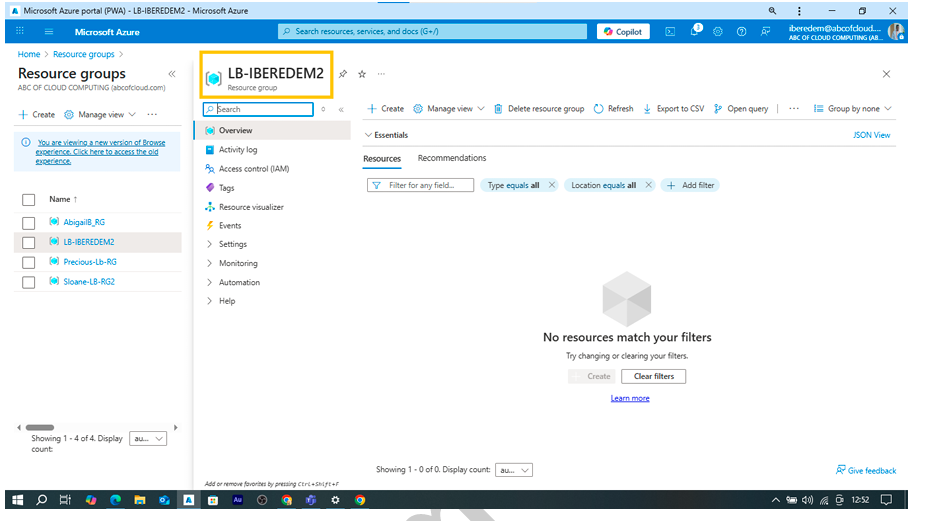
How to Create a Virtual Network
Note: I used a different subscription and Resource group when
showing how to create a Virtual Network.
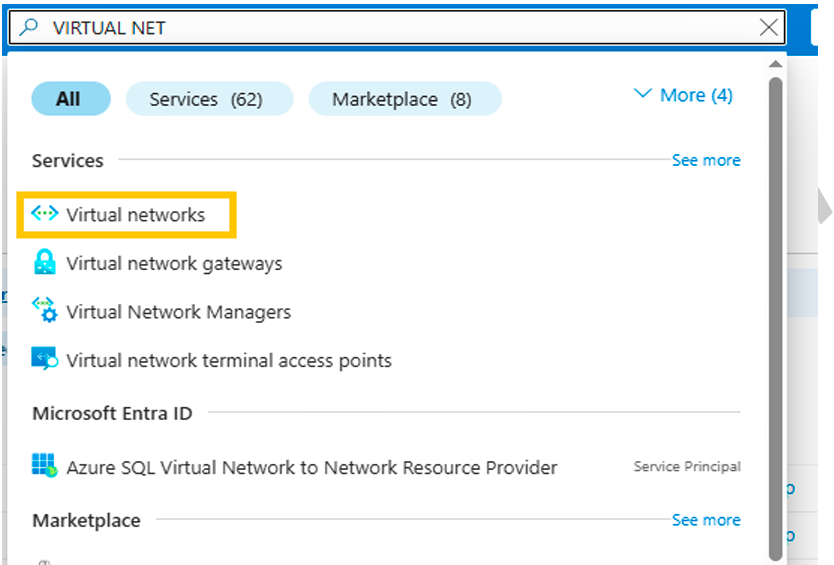
Go to Virtual networks in the portal
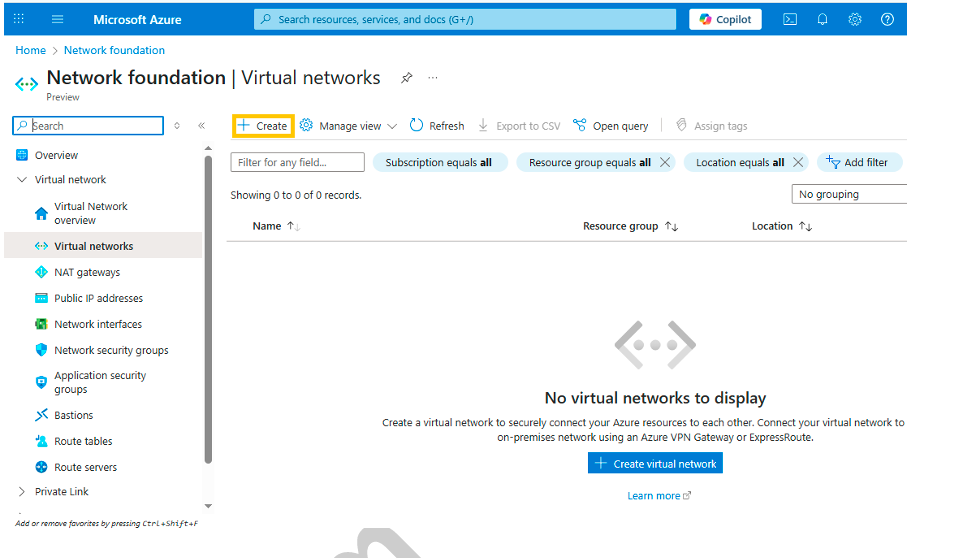
Click “+ Create”
Choose your resource group
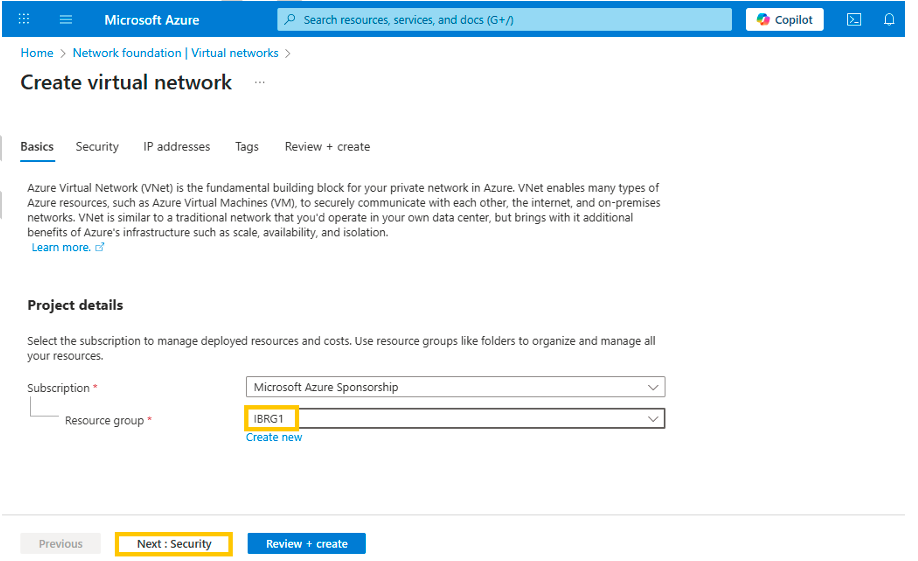
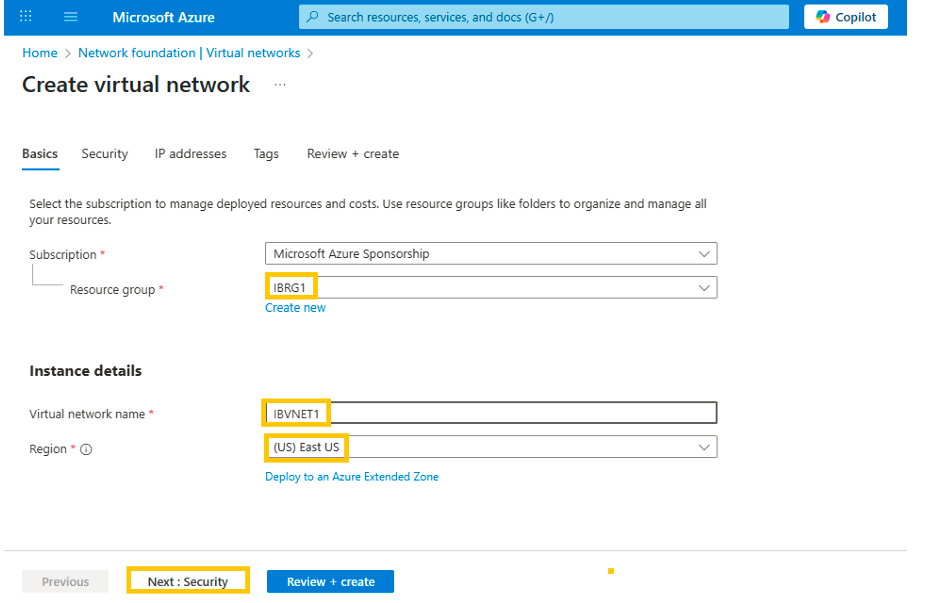
Next, Name your VNet, set your region
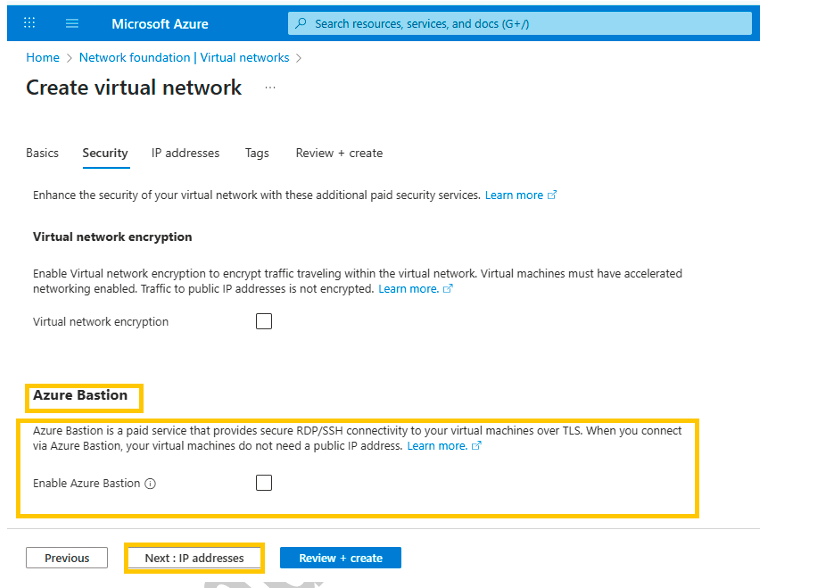
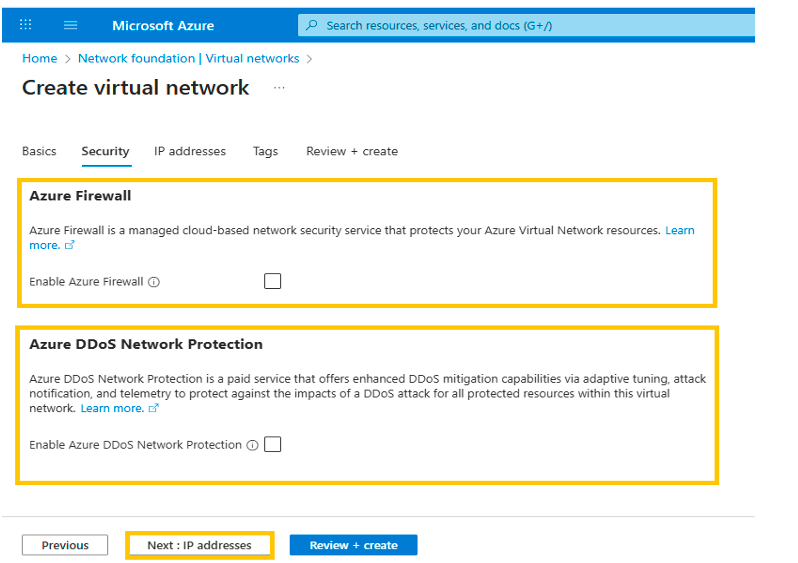
Enable security if you intend to, for this documentation, I didn’t enable any
security since its for testing purposes
Configure address space and subnets
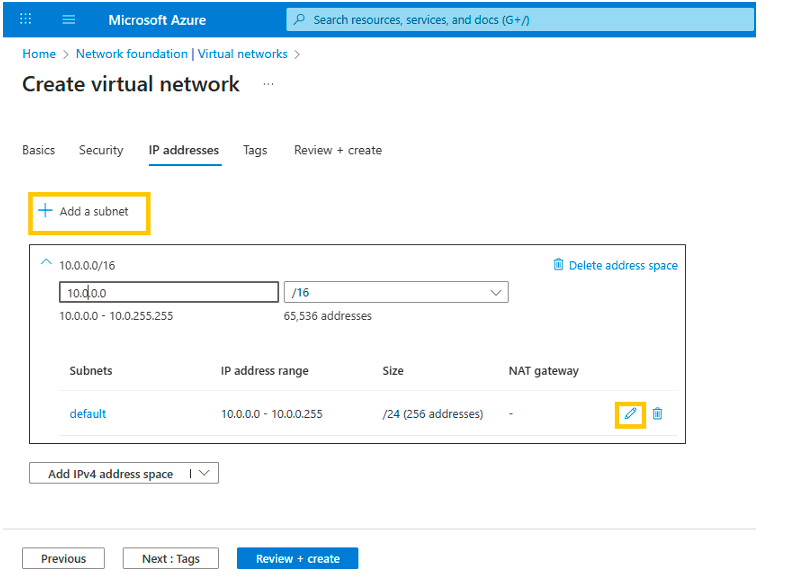
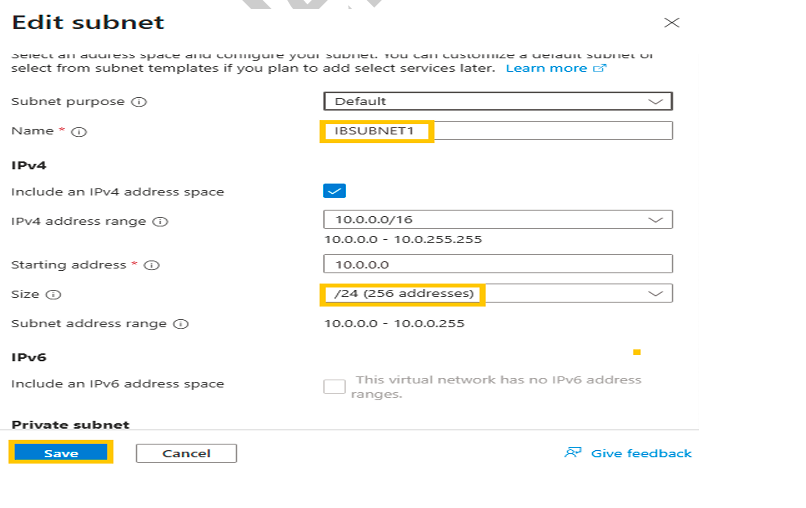
Next, You edit subnet name and size
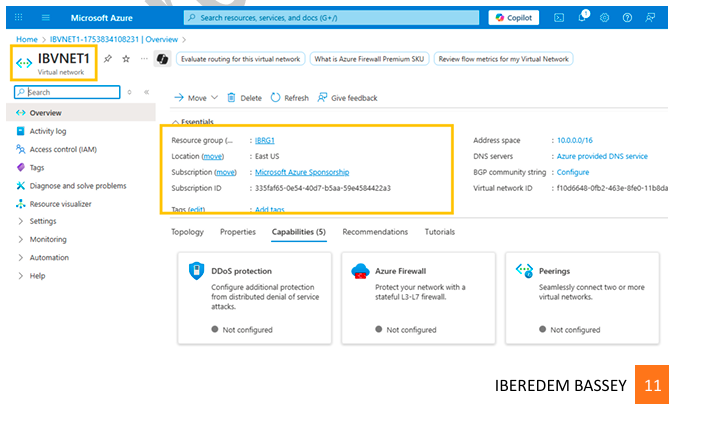
Hit “Review + Create” → “Create” 2nd picture shows Virtual Network created. 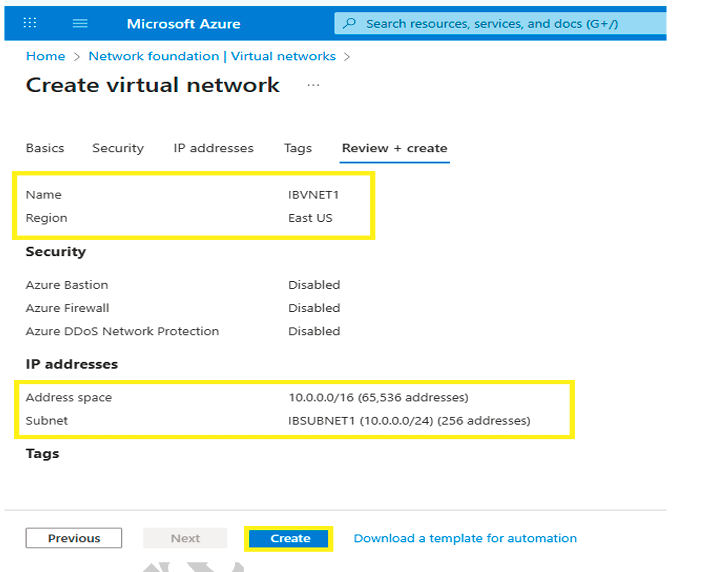
Finally, Image showing the Virtual Network has been Created
Check out more posts on LinkedIn by clicking this
Click here for more Azure content in this blog